Film Scanning with the Nikon Coolscan 9000

Why I Use Multiple Film Scanning Methods
I have spent a lot of time looking at different methods of film scanning to find approaches that work for my needs. Those needs are not always the same. Sometimes I want to quickly scan a large number of images at acceptable quality, and in those cases I rely on camera scanning. Other times I am looking for the best possible image quality with the least amount of time spent cleaning up dust.
Choosing a Scanner for Medium Format Film

6 × 9 Portra 160
There are plenty of dedicated film scanners that produce excellent image quality and have strong dust removal. As film size increases, though, those options quickly disappear. One of my main requirements was the ability to scan film up to 6 × 17 cm. That requirement led me to the Nikon Coolscan series and, eventually, to a local Facebook listing.
On paper, the Nikon Coolscan 9000 checks all the right boxes. It offers 4000 dpi resolution, best-in-class dust removal, and a large scan area. In practice, there is a major issue with the standard film holder.
The Problem with the FH-869S Film Holder
The FH-869S 120 strip film holder is effectively unusable. It fails at its most basic job of holding film flat. I struggled to get even 6 × 4.5 cm frames, the smallest medium-format size, in focus across the entire image area. The holder relies on tension to flatten the film but only supports the edges on two sides, which simply does not work.
Heavy crop of a 645 frame. Notice how the right side of the image has visible grain while the life side looks soft.
The film flatness problem was severe enough that I seriously considered reselling the scanner and moving on. Nikon’s glass film strip holder exists, but it is prohibitively expensive and was not a realistic option for me.
Stephan Scharf Film Holders

After reading more about the issue, I decided to take a chance on a custom 3D-printed film holder developed by Stephan Scharf. I ordered masks and components for 6 × 4.5, 6 × 9, 6 × 12, and 6 × 17. The total cost ended up being quite high, but if it could keep the film flat, it would solve the core problem.
The holders from Stephan turned out to be well worth the cost.
Effectiveness of Nikon Scan ICE
ICE can be a rather magical feature in inserting a negative with dust, lint, or whatever else on it and getting a scan free from all of those. I have found that with the Epson V850 series, ICE will find and attempt to clone out dust but will leave a visible artifact in the image. These artifacts need to be cloned out of the final scans and are more difficult to detect than the dust they replaced. I eventually gave up on the feature in that scanner.
ICE in the Coolscan when using Nikon Scan software is nearly flawless. In the example below, dust of different shapes and sizes are effectively erased from the resulting scan. With larger negatives, this can save a substantial amount of time manually cleaning up each file in preparation for a large print.
ICE Disabled

ICE Enabled
Resolution Achieved by Film Size
With these holders, I am now able to achieve the following effective resolutions from each film size:
6 × 4.5: approximately 56 megapixels
6 × 9: approximately 112 megapixels
6 × 12: approximately 160 megapixels
6 × 17: approximately 240 megapixels

Two scans to capture an entire 6 × 12 frame.

100% crop of the above image with my normal sharpening applied
Below are example scans produced with the Coolscan 9000.
Panoramic Scanning with the Coolscan 9000

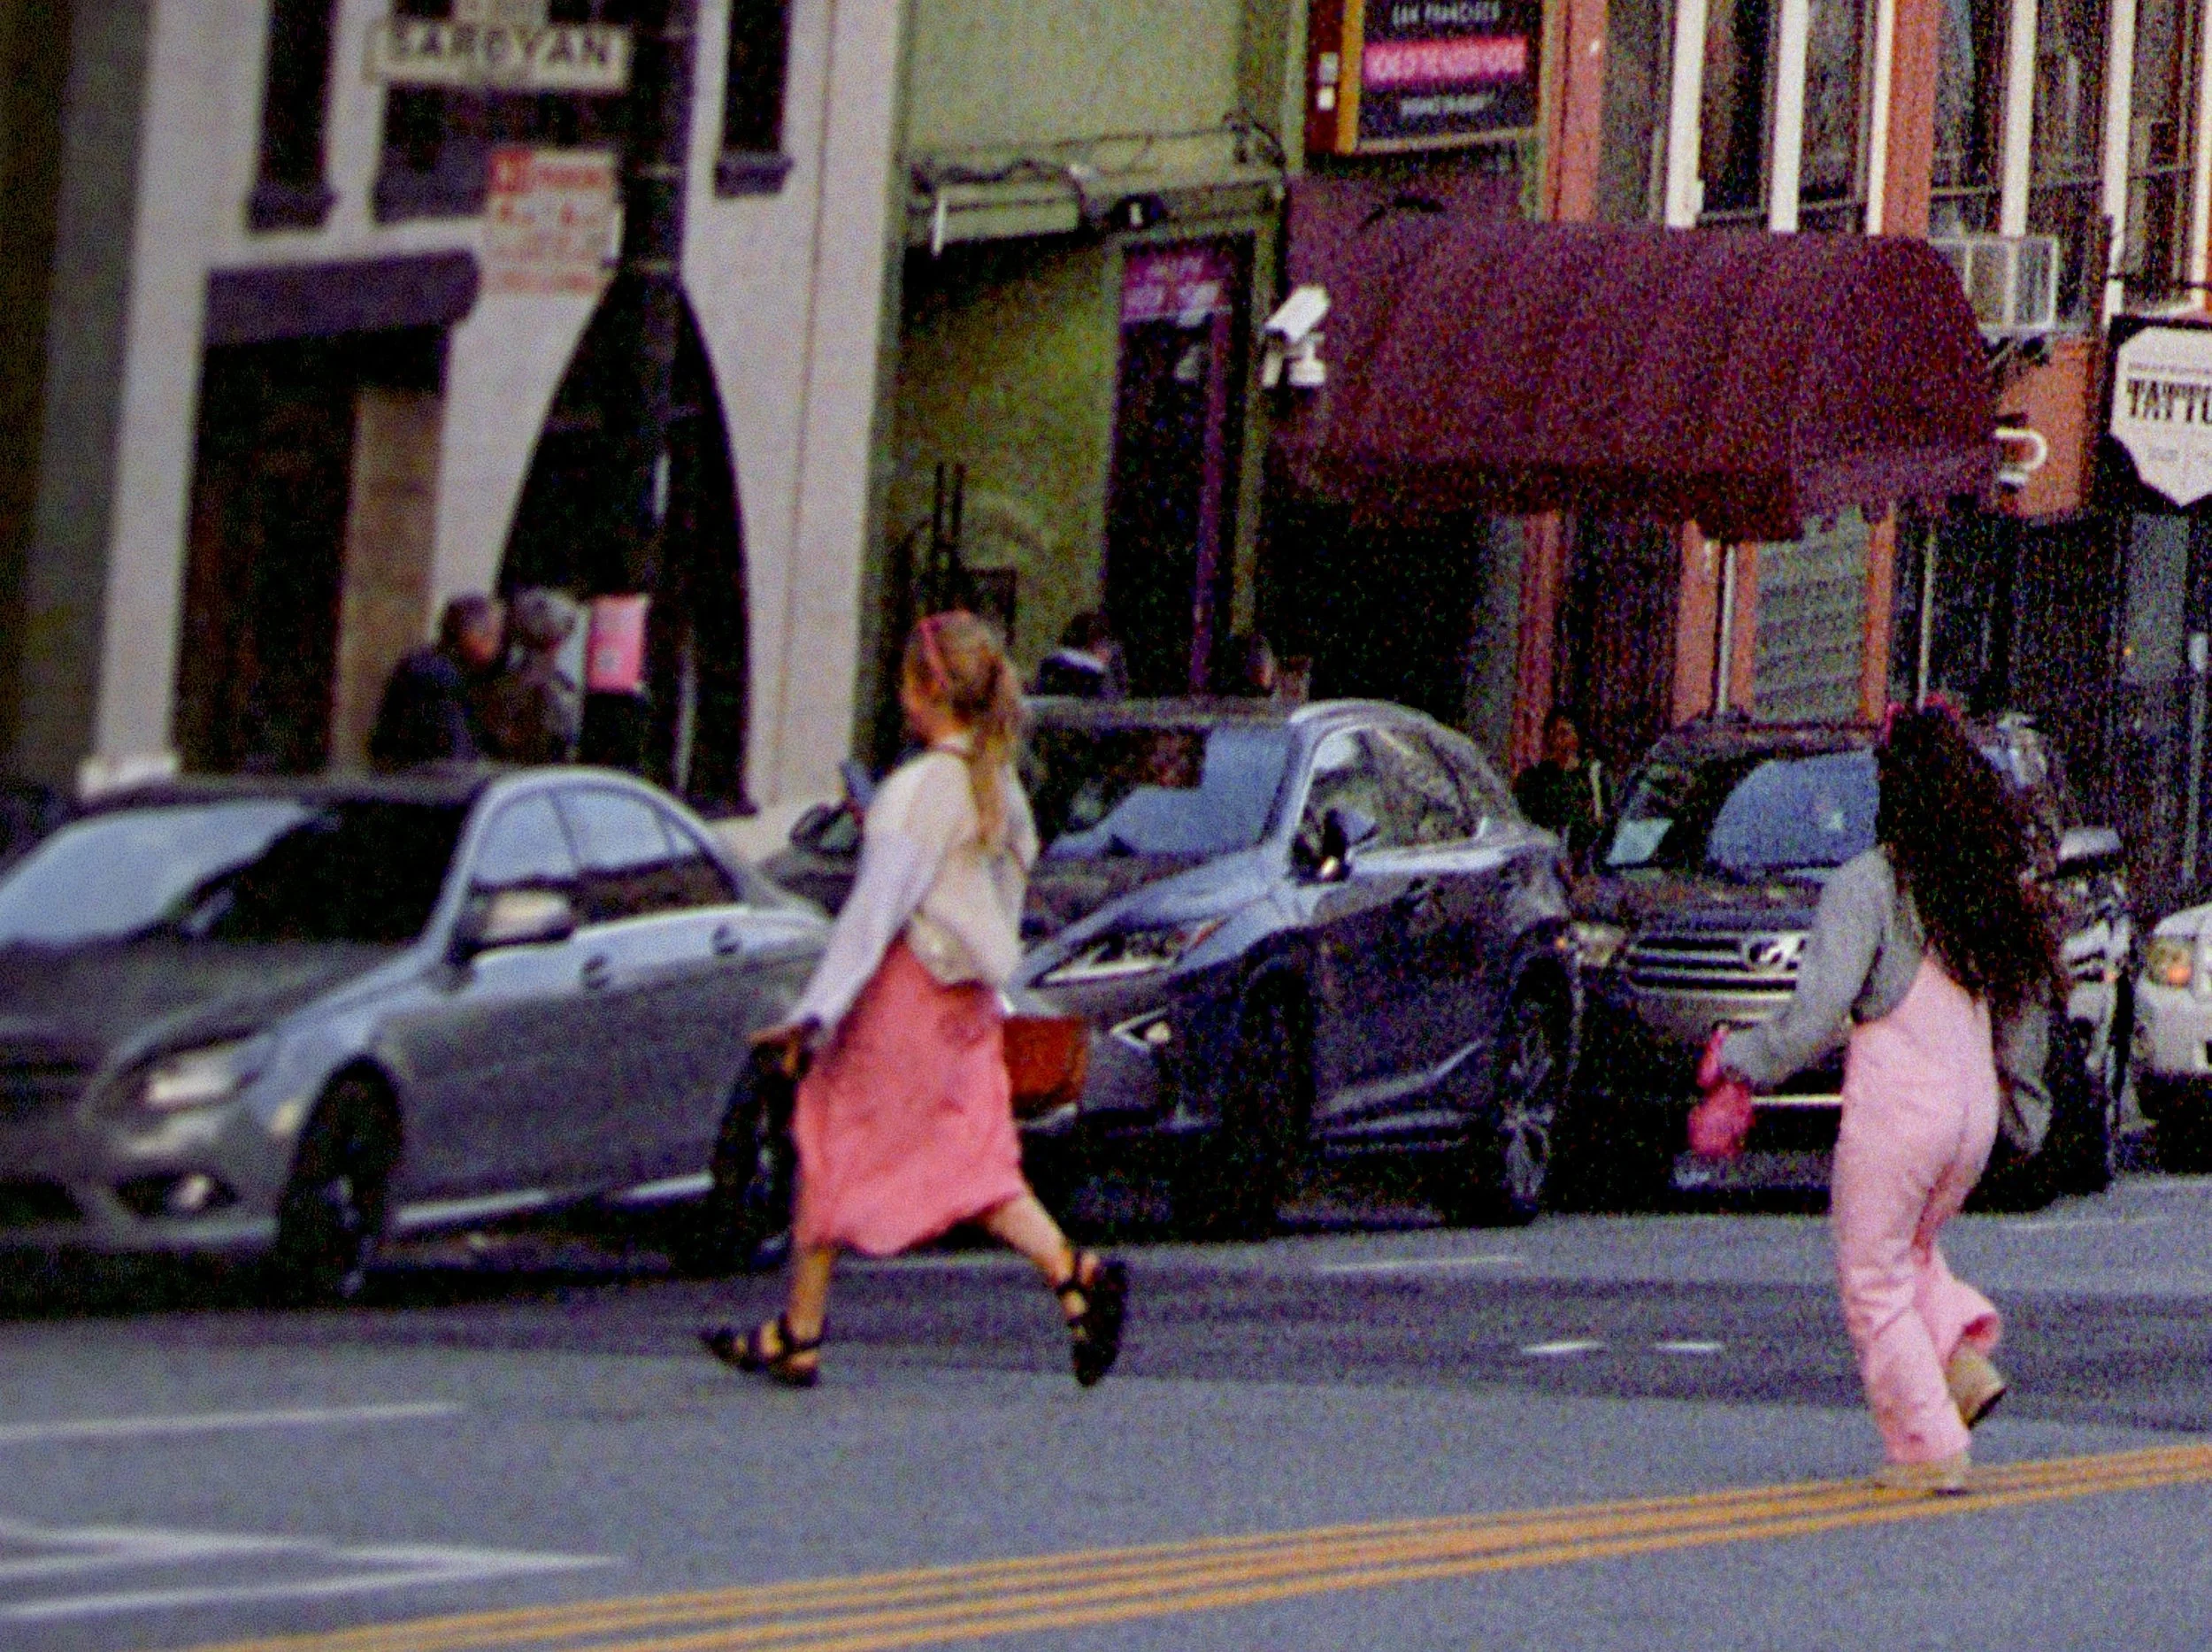
6 × 17 Ektar Scan
The Coolscan 9000 can only capture a maximum scan length of roughly 9 cm in a single pass, so multiple scans are required to cover the full image area. This is a small inconvenience that is eaisly worked around.
Nikon Scan Setup and Preferences
While the Coolscan can be used with Silverfast or Viewscan software, I prefer to use Nikon Scan because it is free and, more importantly, has the best ICE implementation. I use a pcie expansion card that adds a firewire port to my Windows 11 desktop to connect the scanner.
In Nikon Scan preferences, it is essential to disable auto exposure and autofocus for both single and batch scans, and for both color negative and color positive film. Any variation in exposure or focus between scans will make stitching much more difficult and will ruin the final result.
I have found it important to turn off Nikon Color Management as well and rely on a custom profile to get the best color out of slide film.
Step-by-Step Panoramic Scanning Workflow
I start by setting up two previews, both configured as color positive. I use autofocus on one area of the image and then copy the resulting manual focus adjustment value so that both previews use the exact same focus setting.
Preview both scan windows as color positive
Use autofocus on one area of the image
Copy the resulting manual focus adjustment value and apply it to both previews
No curve adjustments
No analog gain adjustments
Gain may be adjusted for color positive film, but all scans must use identical values
ICE: Normal
Super Fine Scan: Enabled
Bit depth: 16-bit
For the first scan, I use the position adjuster to place the preview so that the film holder is minimized in the frame. This ensures there is enough overlap between scans for stitching. Once the initial scans are complete, I manually reposition the second preview to capture the remaining image area, again making sure there is some overlap, and scan the next section. This process is repeated until the entire image has been captured.
Stitching and Post-Processing
Once all sections are scanned, I stitch the files together before doing any image processing. I typically use Microsoft Image Composite Editor for stitching. After that, I either invert negatives manually or use Negative Lab Pro in Lightroom.
ICC Profile
For getting the best results from scans of slide film, I found that creating a custom profile for the scanner has been very helpful. Using an IT8.7 target and the free CoCa software, I created an ICM file that can be applied to scans which get be very close to a final result with only adjustments to exposure and endpoints being needed for most images.
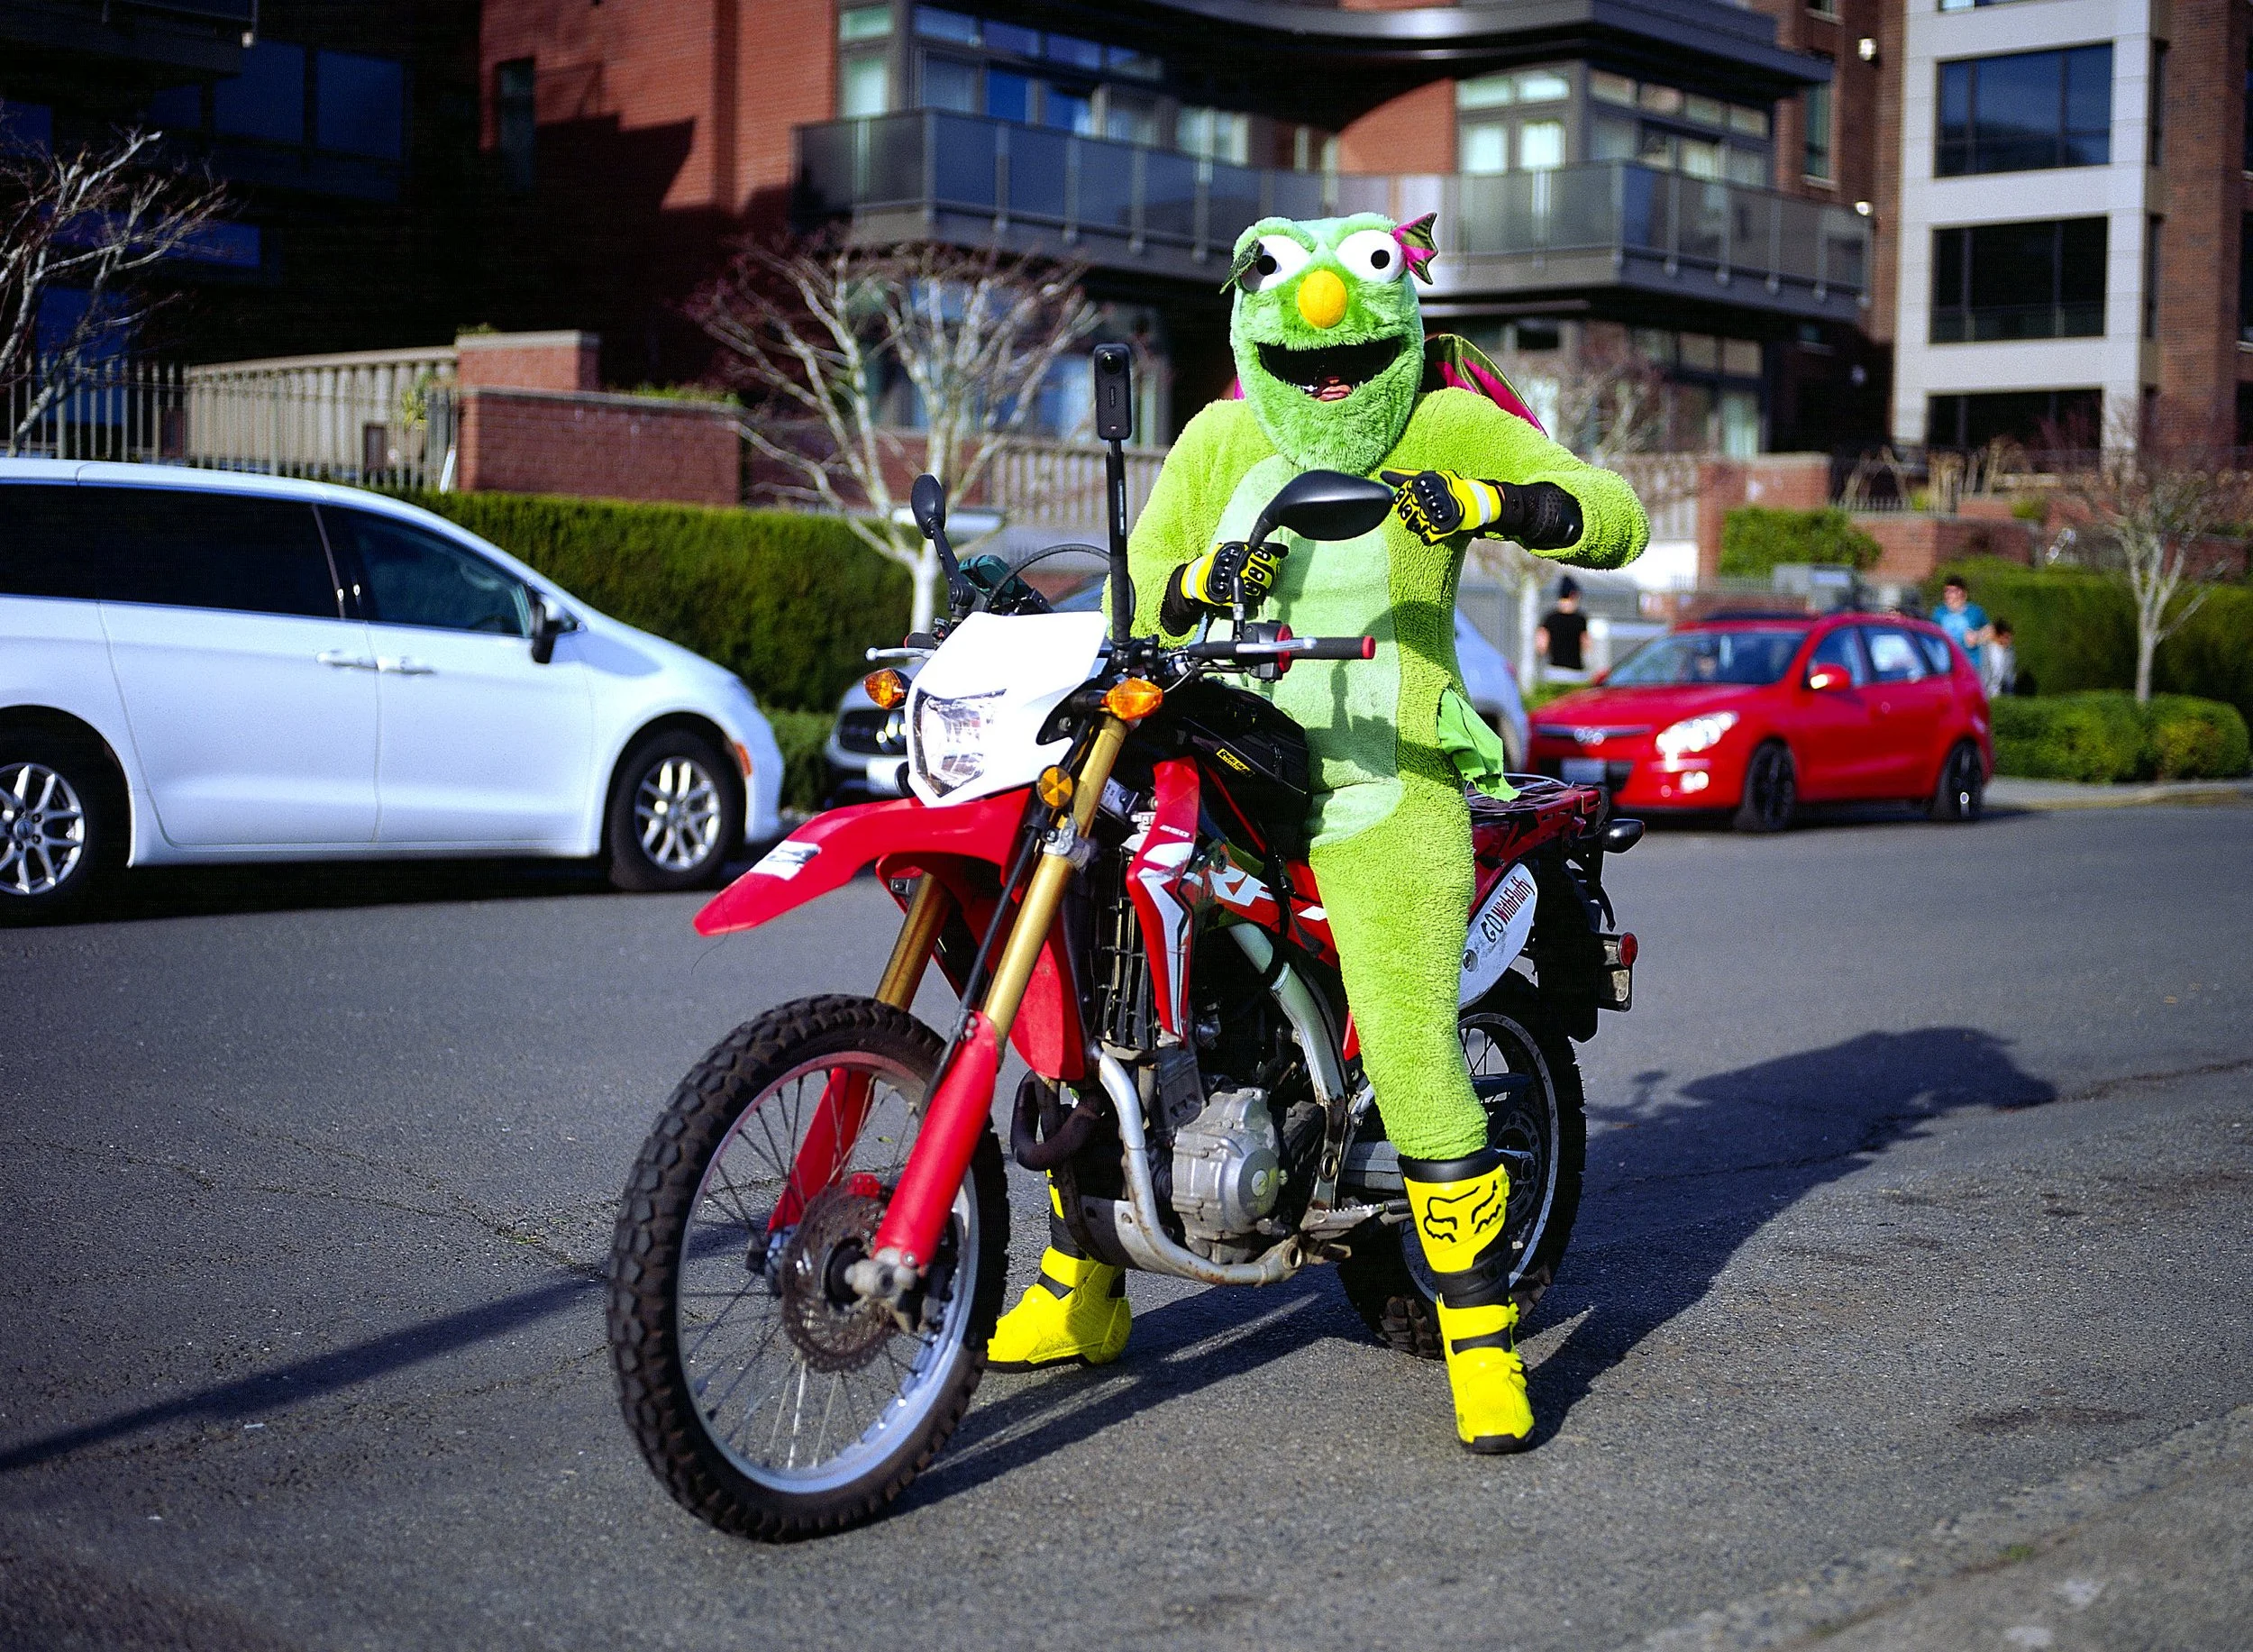
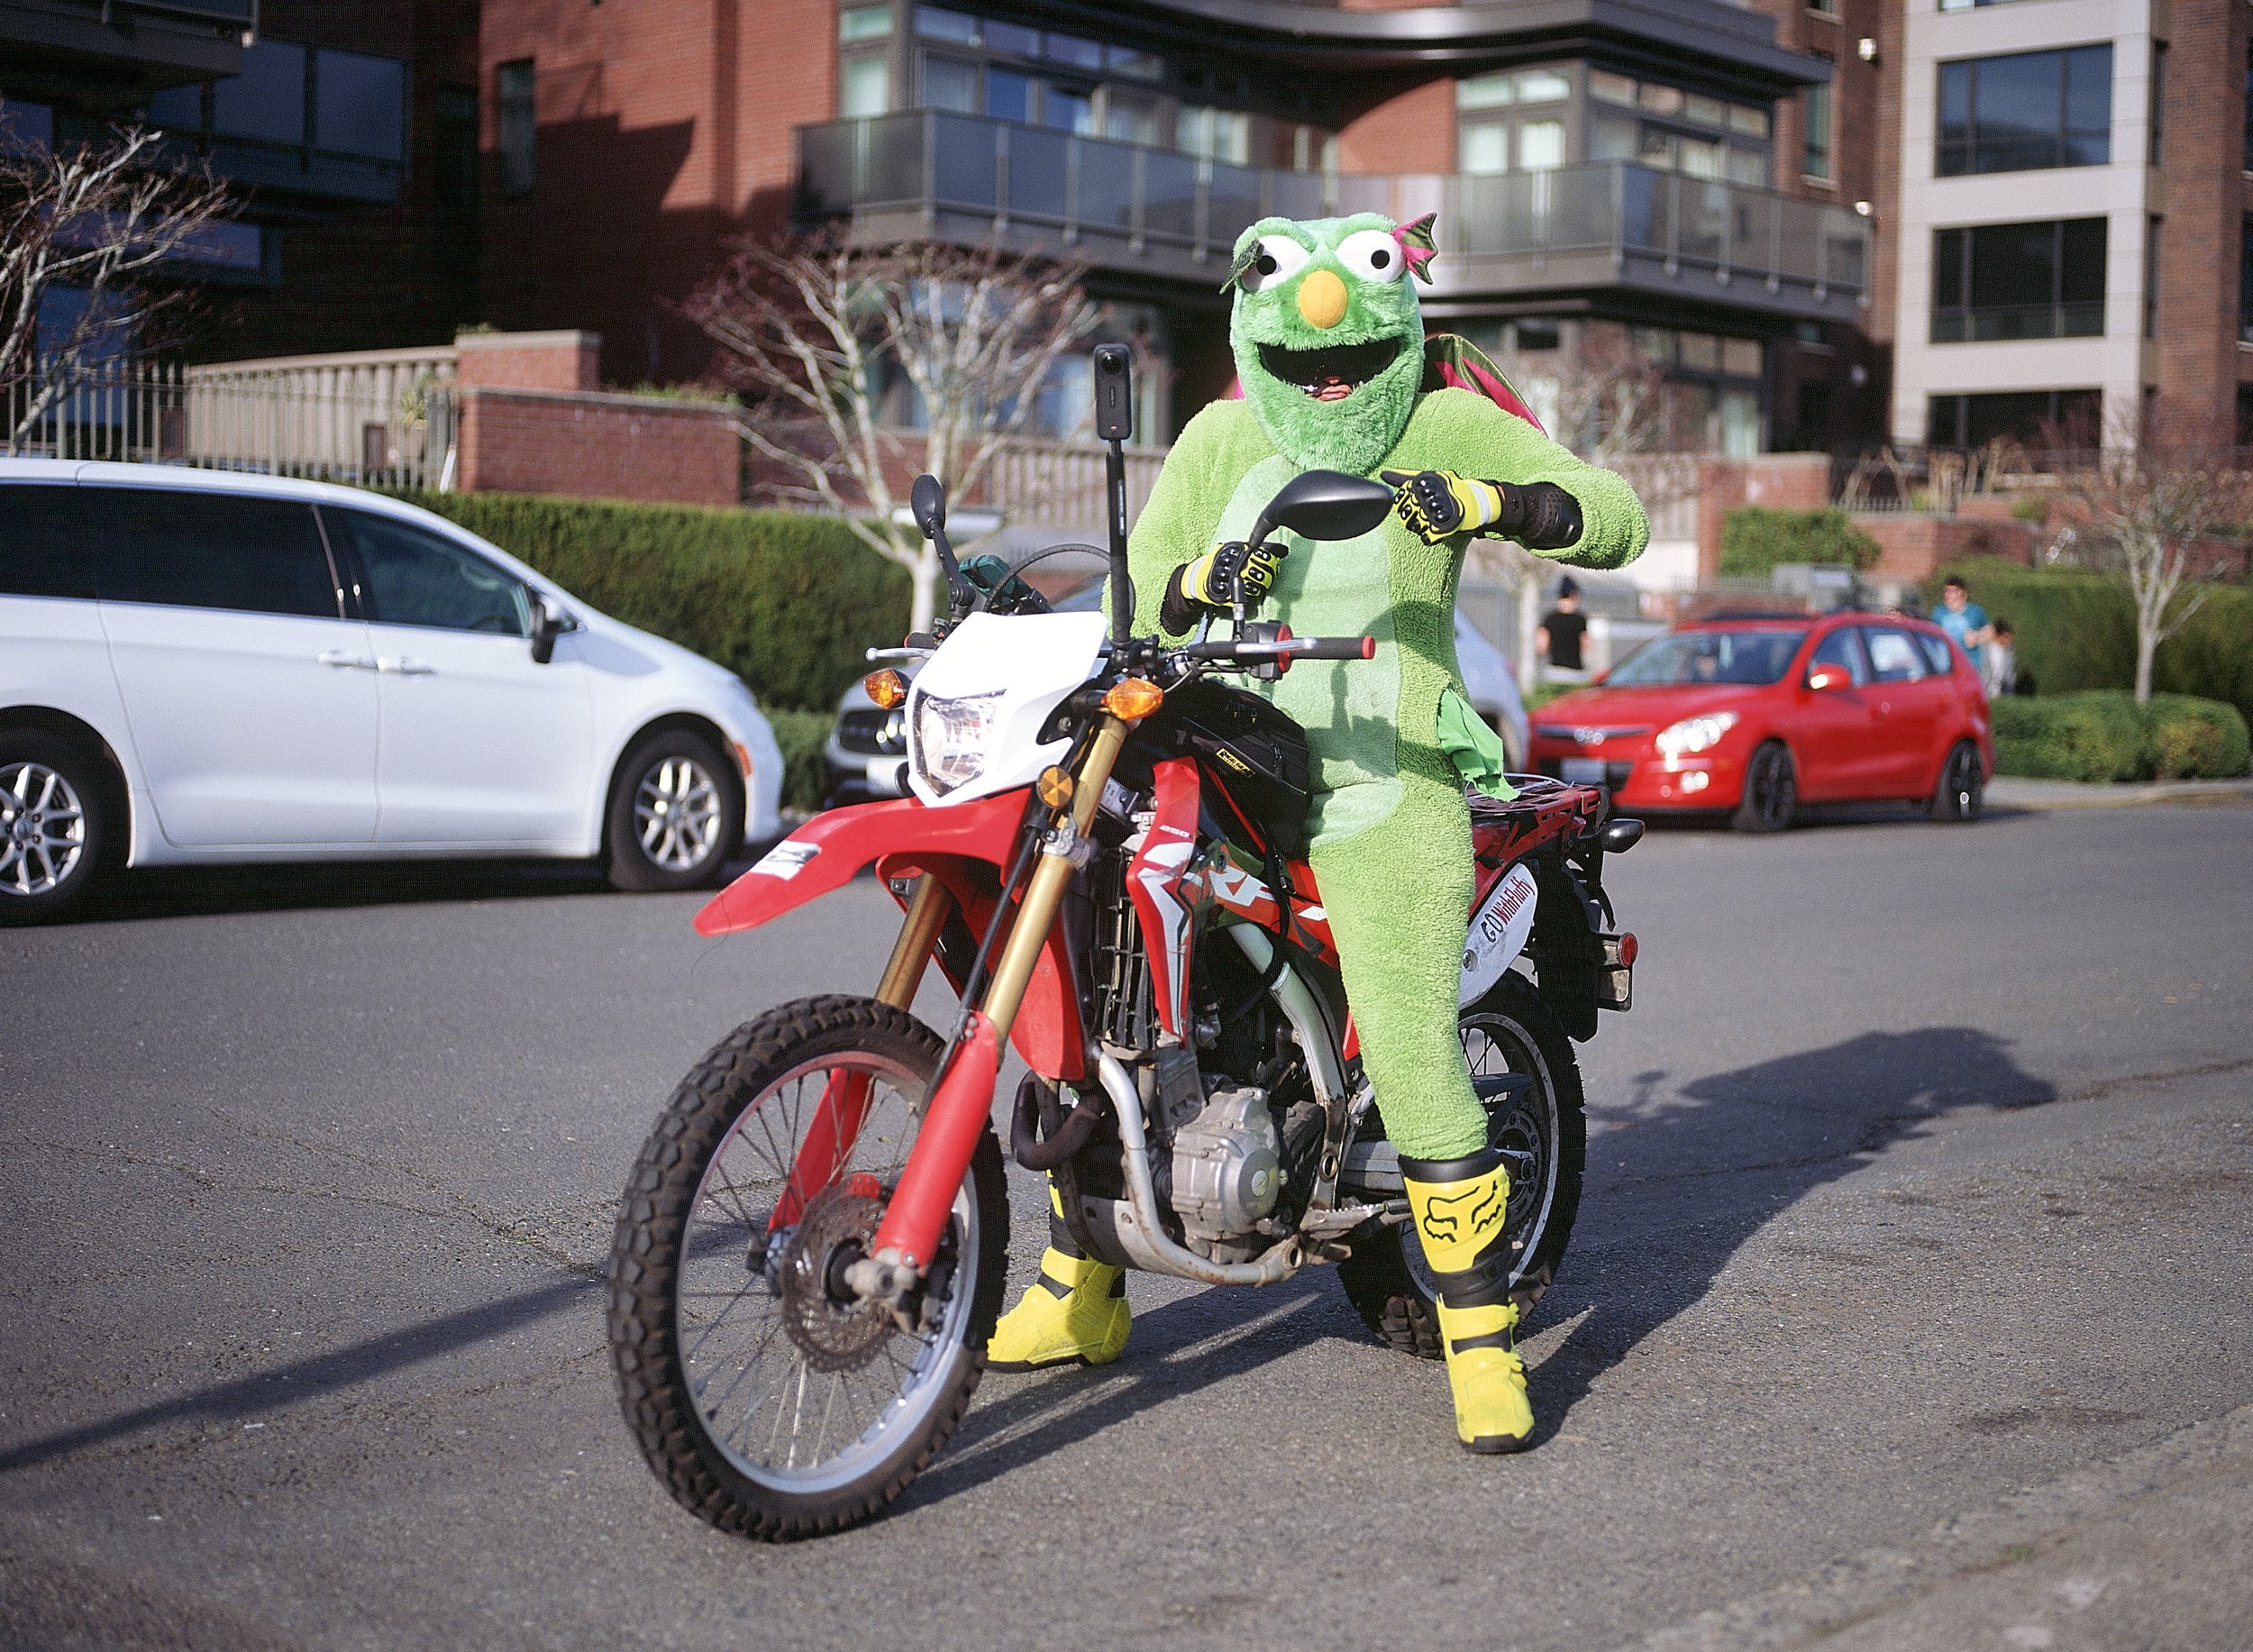
Below are some examples of images with the same settings. The only difference is that the profile is applied to one.


Is it worth it?
Yes. Spending a little more time setting up a scan and waiting a bit longer to get a high resolution scan that doesn’t require 30 minutes of cloning dust out is well worth it for me. Whether the $1700 for the scanner and additional $400 for usable holders is worth it will entirely depend on your budget and goals but the end result will not disappoint.